This document is based on a draft curriculum to be used for the 2016 Fall Tech Club (at the Waldorf School of Pittsburgh). During this club, students will work together to create a robot that can print quotes out using a receipt printer when a button is pressed, and blink its eyes.
Learning Goals; Materials needed; Setup; Curricular plan.
Learning Goals
The learning goals of this set of exercises include
- Understanding the things that make up a computer (memory, processing, and so on)
- How a computer interfaces with the world (by sensing, or actuation) and relating this to things like a keyboard and monitor that are used frequently
- How to build hardware that can support sensing (specifically using a single button)
- How to build hardware that can support actuation (specifically, blinking an LED)
- How a computer can build on sensors and actuators to communicate
- Morse code
- Print statements
- Programming
- Primitive types such as integers and booleans
- Arrays that contain text
- Picking a random number
- Conditionals
- Possibly loops
- 3D modeling for 3D printing
- Basic constructive geometry
- Dimensionality in the real world
- Printability
Materials include example purchasing links.
Per student (or pair of students):
- Working Raspberry pi
- Pi 16 gb sd card
- Monitor
- Keyboard
- Breadboard
- Buttons
- Breakout board connection
For the whole group:
- Jumper Wires
- Wire
- Wire Strippers [ideally 2-3]
- Raspberry pi for the installation (with Wheezy installed)
- Receipt printer
- 330 ohm resistors (need at least 2 per student, 20 is in a pack)
- 5 LEDs (need at least 3 per student, 20 is in a pack)
- Working 3D printer for printing out body parts
- Cardboard box for head
- Table or other stand for robot
- Cardboard box for submitting quotes
-
- Pad of paper for writing quotes on
- Pen to attach to everything
- Materials for decorating robot (think straw man? Or tissue paper & glue? Or paint?)
-
- Mod podge
- Newspaper
- Acrylic Paint [jen can bring]
- Projector (for demonstrating programming to the class)
Setup
- Make sure each Raspberry pi has a working OS and SD Card
- At home
- At school
- Install the following libraries:
- RPi.GPIO library
- Can do before they come to school
- Prepare each SD card with source code
Curricular Plan
Week one:
Additional Materials Needed
- Printout of circuit board for a switch
- Printed information on how to read resistors
- Buttons, resistors, breakout boards, etc.
Lesson Plan
- Introduce plan for project
- Introduce the Raspberry Pi
- Introduce typing briefly ?
- Introduce very basic python programming skills
- http://pythontutor.com/live.html#mode=edit
- Here is a ‘Hello World’ program
- Here is a program that randomly selects a number
- Goal: Produce a program that randomly selects a string from an array of strings
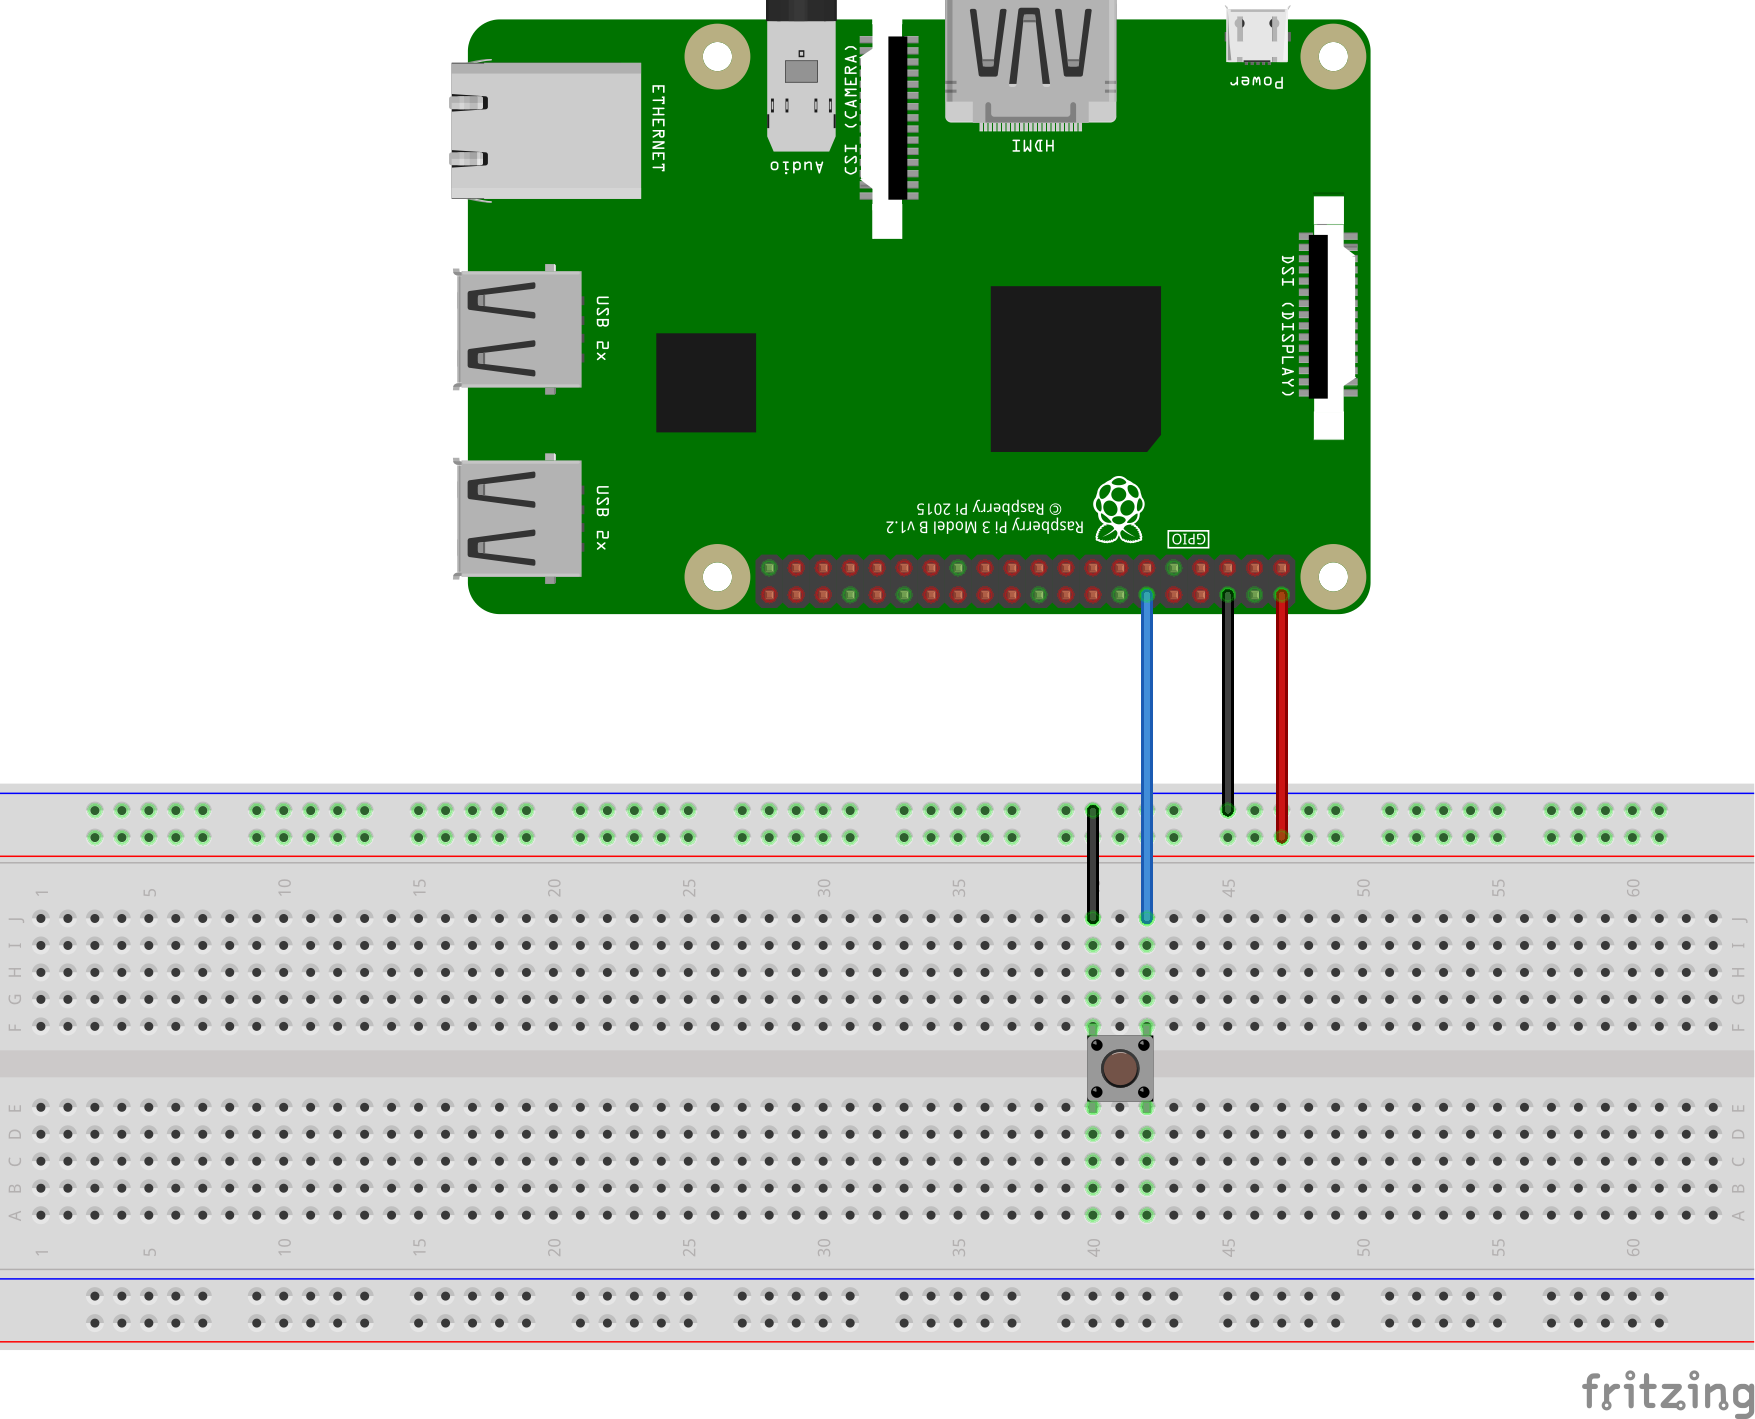
- Introduce how input is taken from a button using the GPIO pins
- Here is a tutorial on taking input from a switch using a Raspberry pi
- Work with the students to set-up the circuit
Week 2
- Continue work on circuit setup
- Introduce the python programming environment on the Pi (which they will need to read input from the GPIO pins). Base code for controlling pins Get a working program that responds to a button press
- Come up with a plan for decorating the robot
Week 3
- Introduce Tinkercad
- Show the students how to make a name tag for themselves
- Introduce concept of size
- Let each student make a name tag or bookmark
- Work on Robot decoration project (physical world & regular world)
- Programming
- Introduce conditionals
- Work on printing out a string if a button is pressed.
- Possibly: Improve the button press program by adding de-bouncing
Week 4
Materials:
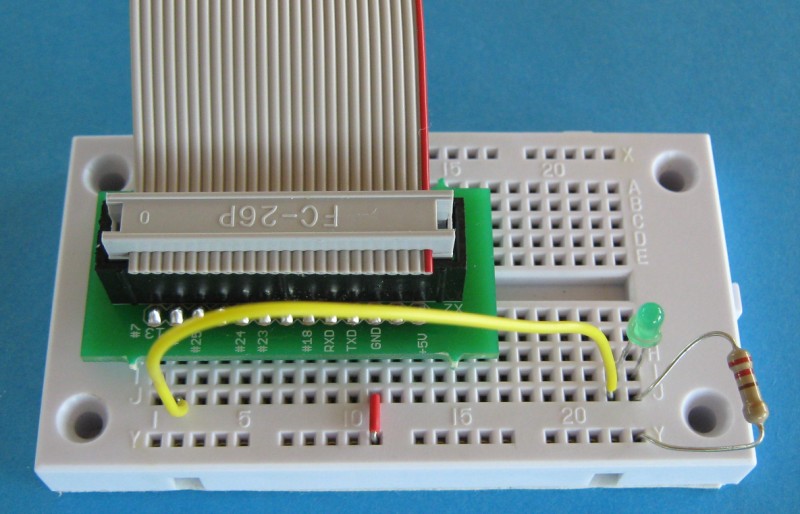
- Print Picture of LED circuit
- Bring LEDs and Resistors, breakout boards, etc.
- Bring printed versions of bookmarks/name tags that are finished
Activity:
- LED circuit tutorial
- Programming
- Introduce the concept of output to LEDs
- Build a circuit that lights an LED up
- Write a program that lights an LED up
- Possibly: Work on a version of the circuit / program that has 2 LEDs instead of 1 (or more than 2 LEDs).
- Possibly: Work on body parts
- Further work on name tags/bookmarks
Week 5
- Programming
- Introduce concept of Morse code
- Morse code picture guide
- Write a program to flash whatever you want (doesn’t have to be morse code)
- If students want to: Base code for displaying text using MORSE code
- 3D modeling: Work on body parts
- Others can work on other robotic decorations
Week 6
- Assemble the robot
- Catch up on programming tasks